
|
|---|
|
|
|---|
|
Beginners Guide to Electric Vehicles Introduction Electric Vehicle Types Choosing an Electric Vehicle Charging Technology Charging Your EV Home Charging Solar and Ways to Reduce Your Bill Contact the Author |
Electric Vehicle Charging Choosing a Level 2 Charger Not all Level 2 chargers are created equal. If you search through the Internet you will find a range of chargers of different sizes. I will break down the differences between the chargers enabling you to make an informed decision as to what you should buy. Connection Plug If you are purchasing a car charge connector for anything other than Tesla, you will be looking for one that has a J1772 connector. Tesla uses its own proprietary charge plug that is not compatible with non-Tesla cars. However, there is at least one third party that manufacturers a conversion jack for other electric vehicles. Power Output All level 2 chargers require a 240 volt power source. However, not all of them are capable of transferring the same amount of energy to your electric vehicle. Some are rated for 3.6 kilowatt hours (kWhw) while others are rated for 7.2 kWh. Many pre 2017 iterations of electric cars contain internal chargers that can only process under 3600 watts of incoming power to charge its batteries. However, most battery electric vehicles, and most plugins come with higher capacity chargers that can feed 7200 watts of power into your car. If your car is capable of accepting the higher wattage then you probably want to go with the higher capacity charging station if your home infrastructure can support it. Connecting to Your Home You can opt to connect your charging station to your home by hardwiring it through the wall into a junction box, or by plugging it into an outlet installed for the level of amperage your charger is rated for. I strongly recommend you choose to install an outlet and go with a plugin station instead of hardwiring the unit to your home. An outlet allows you to remove the station from the wall by simply unplugging the system. This is important because sooner or later your charging station may break (one of mine broke after 3 months) and will need repair or replacement. This is much easier and if you are not handy you won't have to call an electrician back over to replace it. The plug-in model will also allow you to take the unit with you for traveling. Traveling? For traveling I suggest planning to use public charging station. In most instances you will find that it is too much hassle to charge at relatives homes with anything other than the Level 1 station that comes with most electric vehicles. Unfortunately, a Level 1 station won't add more than 4 or 5 miles per hour. Another option would be to have a charging station that can plug into an electric dryer outlet. Be aware, that there are two different electric dryer outlet configurations so you will need to have both with you to plug in. Tesla sells adapters for their mobile station you can purchase from the Tesla web site. If you plan to plug the unit into a dryer port keep in mind that most electrical dryer jacks are connected to a 30 amp breaker. If you try to plug in a larger 7200 watt station to a dryer breaker you are going to blow the circuit. 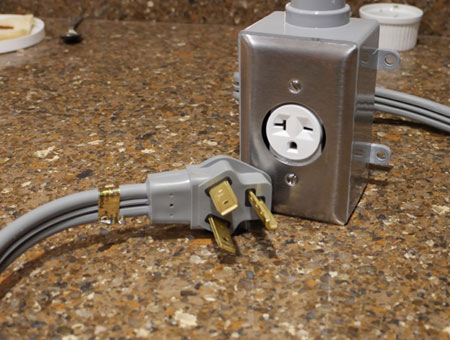 Consider making up a handy adapter to allow you to plug your station into a dryer outlet when traveling. I use this to plug into my mom's house when we visit her. I have about $30 invested in this little converter. This will only work with a lower amperage station. Don't try making one for a 7200 watt station. Placement Think carefully of where you want to situate your charging station. Optimally, you want to install the station in your garage to protect it from the elements. Even though most models are rated for outdoor use, it will take less abuse when mounted inside. Cable Length Many stations come with 18, 20 or 25 foot charge port cables. My stations have 18 foot cables, but for flexibility I would prefer a 25 foot cable. Before purchasing your station use a tape measure to calculate out the distance from the car to point where the station will be mounted. Be sure to add four feet to account for the drooping on the ground. You don't want to tight rope the cable between your station and the car. Both my cars have their charging ports on the front driver's side. Therefore, I placed my station on the left side of the garage. Further, I placed my stations towards the entrance so that my cable will reach one spot in the garage, and both spaces on the front driveway. Always be thinking about maximum flexibility for the location you choose. Station Design There are a couple of cable design types. Some stations allow you to wrap the cable around the unit, others have a hook, while others use a coiled cable. I prefer the straight cable design with a cable hook. Reality is you will not take the time to coil your cable around the unit after each charge. We lay our cable on the shelf next to the car. For the unit servicing the car on the driveway we tend to coil it in a loop on the ground when not in use. The problem with coiled cable installations is the tendency to straight line the cable when charging. You don't want to create a tight rope situation when plugged in as it creates a greater tripping hazard than just laying the cable on the ground. Warranty Probably the most important consideration is the length of warranty offered by the manufacturer. You will want a warranty of at least three years. Stay away from anything less than that. My Leviton EVB32 stopped working after only three months of use. Leviton's response was fantastic as the day after reporting the failure a loaner replacement arrived on my doorstep. After they determined the unit was unrepairable they told me I could keep the loaner or they would ship me a brand new one. This is all the reason why you want to choose the plugin model over a hardwired station. If you are not handy you do not want to have to call an electrician to replace a broken station. Electrical Work Level 2 charging stations require a 240 volt electrical feed. If you have a modern house then this may not be difficult. In this instance you probably have a larger service panel than older homes. If this applies to your home then your electrician might just be able to convert an existing 120 volt outlet in your garage for the EV charging station. A 240 volt feed consists of 2 hot wires and a ground. The higher the amperage of the station, and the longer the distance from the panel, the larger gauge of wire that is needed. If the wire gauge does not measure up to the amperage do not convert the circuit. If you have an older house with antiquated wiring, then your electrician will have to run a new dedicated line to your garage. This may be inexpensive if your service panel is already in the garage. If the panel is installed at the other end of the house then this could be quite expensive. In some instances your service panel may not have space to support additional circuit breakers which means you will need a new panel. Don't overload your service panel as you could burn your house down. You may have a panel rated at 100 amps. When you add up your circuits, including air conditioning, outlets, forced air unit, etc you might find you are close to capacity. You don't want to add a 40 amp car charging circuit if there isn't capacity for it. NEXT: 2015 EV Charging Stations |